The purpose of this tutorial is to introduce the steps needed to setup the GLFW and OpenGL libraries using environment variables, using inheritance and using OOP design. The GLFW and OpenGL libraries were linked in visual studios by right clicking the project (Intro to OpenGL) and selecting properties. Going to “VC++ Directories” then “Library Directories”, the following path was added: $(SolutionDir)dep\glfw\lib;$(LibraryPath). Then under the “Linker” section and under “Input”, the following items were adding: opengl32.lib;glfw3.lib;%(AdditionalDependencies). This was done to both the debug and release configurations.
In the App.h file, a class was created called: Application. This class will be used as the “base” class that will get inherited by other classes. This class has four virtual functions under the public level. There are two bool virtual functions and two void virtual functions. Each function is equal to the value of zero. When inheriting classes use these functions, they will perform an override to them. The solar system class inheritances from the application class. The solar system class overrides the four virtual functions in the application. In the main source file, the main function creates a new solar system. It then calls the four overridden functions.

The purpose of this tutorial is to introduce the steps needed to create our own camera class that uses inheritance. This project creates a moveable camera that users can use to move around render objects. There are two camera classes: Camera and FlyCamera. FlyCamera inherits the Camera class. The FlyCamera overrides the Camera classes update function. Within the update, the math to move the camera is performed.
The FlyCamera update function uses rotation matrix math to rotate the camera around rendered objects. When using the mouse to move, the function performs cos and sin calculations on the rotate variable, which equals the offset of x and y respectively. When using the w, a, s, and d keys to move the camera, the function moves the camera on the x and z axis by taking the cameras speed and multiplying it by delta time.
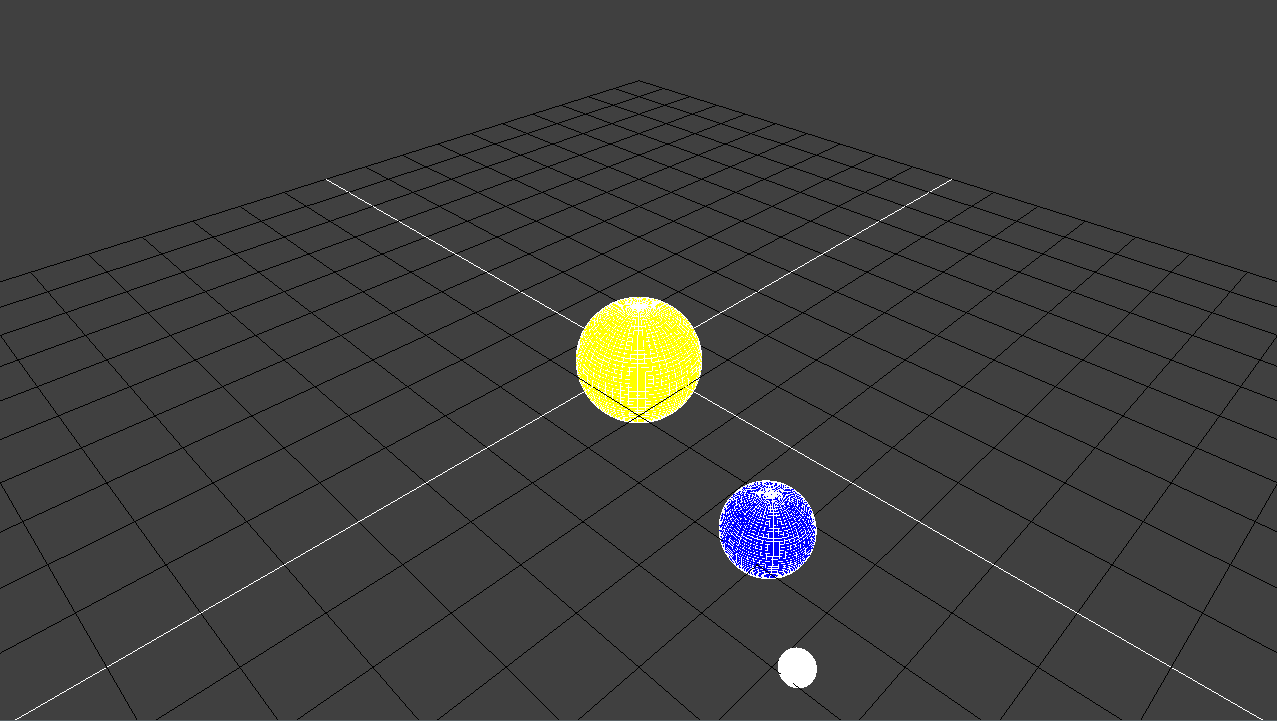
The purpose of this tutorial is to introduce the steps needed to render a static plane, a static cube, a procedural sphere and take in separate shader files. This project has the ability to render a static plane using the createPlane function. The plane has a vertices and indices array of four where the values have been set manually. The function then generates buffers and vertex arrays. It then binds the buffer and sets the buffer data. It then enables the vertex attrib array and sets the vertex attrib pointers.
This project has the ability to render a static cube using the createCube function. The cube has a vertices array of eight and a indices array of seventeen where the values have been set manually. The function then generates buffers and vertex arrays. It then binds the buffer and sets the buffer data. It then enables the vertex attrib array and sets the vertex attrib pointers. This project has the ability to render a procedural sphere using multiple functions. Before creating the whole sphere, the vertices for a half sphere need to be generated first. In the generateHalfSphereVertices function, a new vertex array is created. A for loop is then used to calculate the half spheres position. The position is calculated by multiplying the radius with the cos(angle) and with the sin(angle).
The next step is to generate the sphere vertices. In the generateSphereVertices function, a new vertex array is created. We then use two for loops: one for the mirids and one for the sides. In the sides for loop, we calculate the y and z positions while leaving x alone (we are rotating around the x axis). To calculate y, we take the y position and multiply it by cos(phi) minus the z position multiplied by sin(phi). To calculate z, we take the z position and multiply it by cos(phi) plus the y position multiplied by sin(phi).
The next step is to generate the indices for the sphere. In the generateSphereIndicies function, a new unsigned int indices variable is created. We then calculate variables botL and botR. botR is calculated by taking the beginning variable (i times vertices) plus vertices plus j modded by vertices times mirid. botL is calculated by taking the beginning variable plus j modded by vertices times mirid. We then push_back both botL and botR to the indicesHolder variable. We then use a for loop to place all of the info stored in the indicesHolder to the indices variable.
We now create the sphere. In the createSphere function, we call the three previous functions. The function then generates buffers and vertex arrays. It then binds the buffer and sets the buffer data. It then enables the vertex attrib array and sets the vertex attrib pointers. The shader information has been placed into separate file: one for the vertex shader and one for the fragment shader. Both files are read from in the program.
|
|
|
|
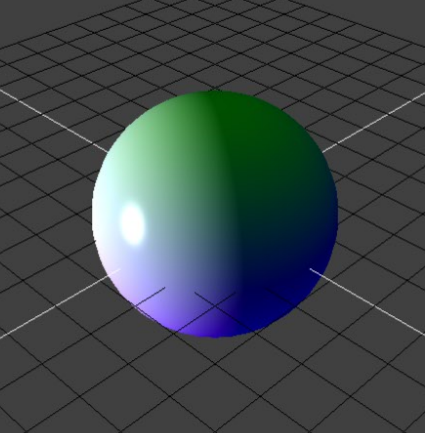
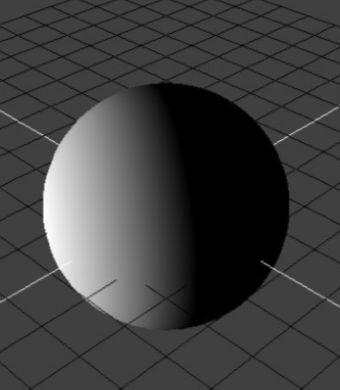
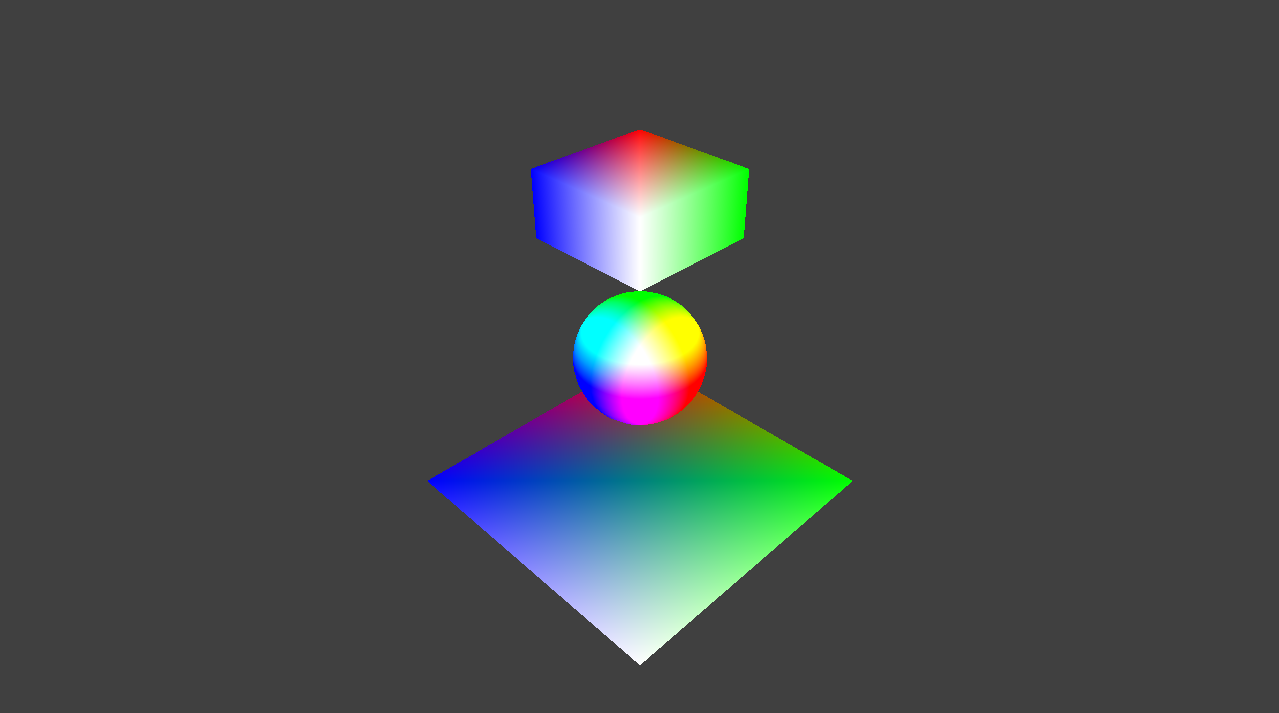
The purpose of this tutorial is to introduce the steps needed to implement diffuse, ambient and specular lighting and understand the different between phong and blinn-phong models. This project has the ability to implement diffuse lighting, ambient lighting and specular lighting.
Diffuse is the color of the reflected light is reflected in such a way that the light is reflected at many angles. It is calculated by taking the kd multiplying it with the id then finally multiplying that with the lambertTerm (k refers to the surface’s material property colors. i refers to the light properties. d refers to what light model is being used. lambertTerm is the dot product between the surface’s normal vector (N) and a vector in the direction the light is coming from (Lm). This result is then clamped between zero and one.).
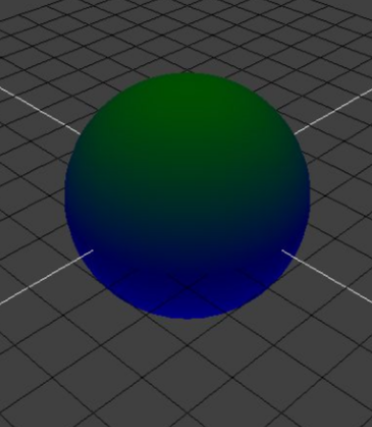
Ambient is the color of the indirect light in an area. It is calculated by taking the ia multiplying it by 0.01, then multiplying that result by ka then multiplying that by the hemisphere (k refers to the surface’s material property colors. i refers to the light properties. a refers to what light model is being used. The hemisphere variable holds the interplate colors from upper and lower hemispheres.).
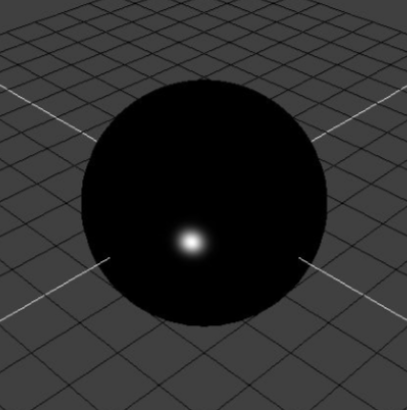
Specular is the color of the reflected light reflected as a single ray off the object’s surface. It is calculated by taking the is multiplying it by ks then multiplying the result by the specularTerm (k refers to the surface’s material property colors. i refers to the light properties. s refers to what light model is being used. specularTerm is the dot product between the light’s reflected ray (Rm) and a vector from the surface to the viewer (V). This result is then clamped between zero and one.).
Both Phong and Blinn-Phong use simple ambient reflection and the Lambertian for the diffuse reflection, but are different in how the specular reflection is calculated. Phong calculates the direction of the reflection vector by using this formula: Rm = 2 * dot(N,Lm) * N - Lm, where Lm is the vector pointing towards the incoming light and N is the surface normal. Both Lm and N must be normalized. Blinn-Phong uses the halfway vector. The halfway vector is calculated by using this formula: H = normalize(Lm + V), where Lm is the vector pointing towards the incoming light and V is the eye direction. The Phong model is used for this assessment project.
 |
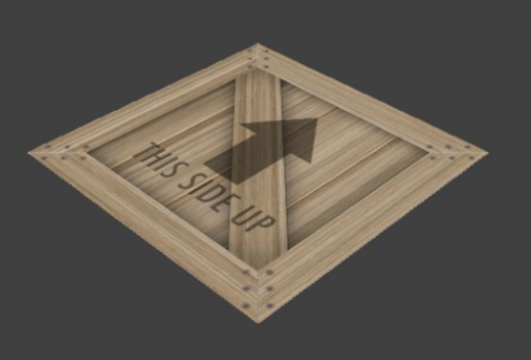 |
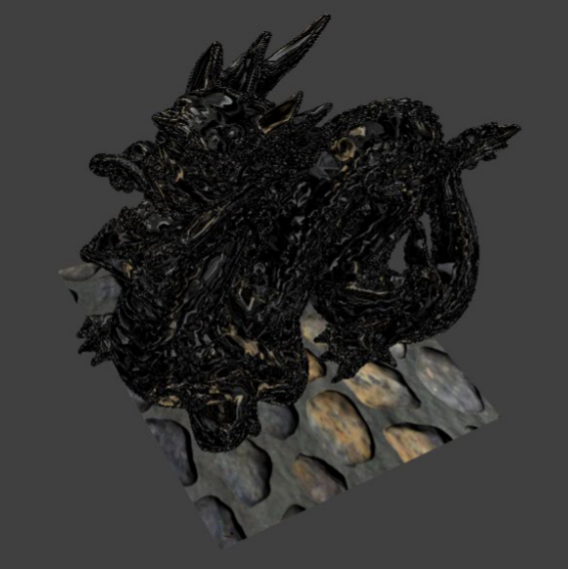
The purpose of this tutorial is to introduce the steps needed to apply a texture to a plane and apply uv mapping.
This project has the ability to apply a texture to a plane. In the app.cpp file under the start function, three variables with a value of zero is declared: imageWidth, imageHeight and imageFormat. A unsigned char data variable is declared using stbi_load. The texture is then generated and binded. In the draw function, a int loc variable is declared. This variable gets the uniform location. The texture becomes active and is bond. In the fragment shader, in the main function: the fragColor equals the texture value, which is the diffuse and vTexCoord.
This project has the ability to apply a uv map onto a 3d object. In the app.cpp file under the start function, three variables with a value of zero is declared: imageWidth, imageHeight and imageFormat. A unsigned char data variable is declared using stbi_load. The texture is then generated and binded. This is done twice: once for the diffuse and one for the normal. A new fbx file is created in this function as well. In the draw function, a int loc variable is declared. This variable gets the uniform location. The texture becomes active and is bond. A for loop is used for a fbx mesh node.
The createOpenGLBuffers function sets up the fbx variable. The createData function sets up the vertices and indices and is called in the start function. The vertex shader sets up the vTexCoord, vNormal, vTangent, and vBiTangent. In the fragment shader, in the main function: the fragColor equals the texture value, which is the diffuse and vTexCoord.
 |
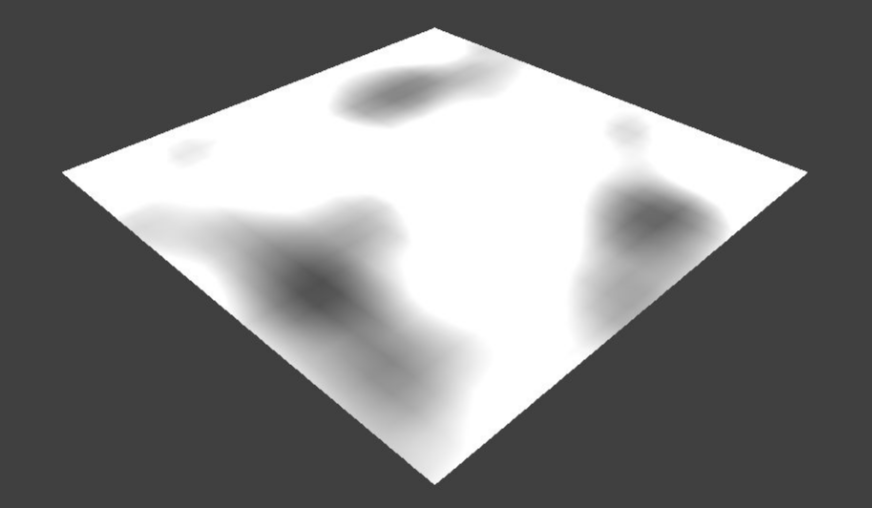 |
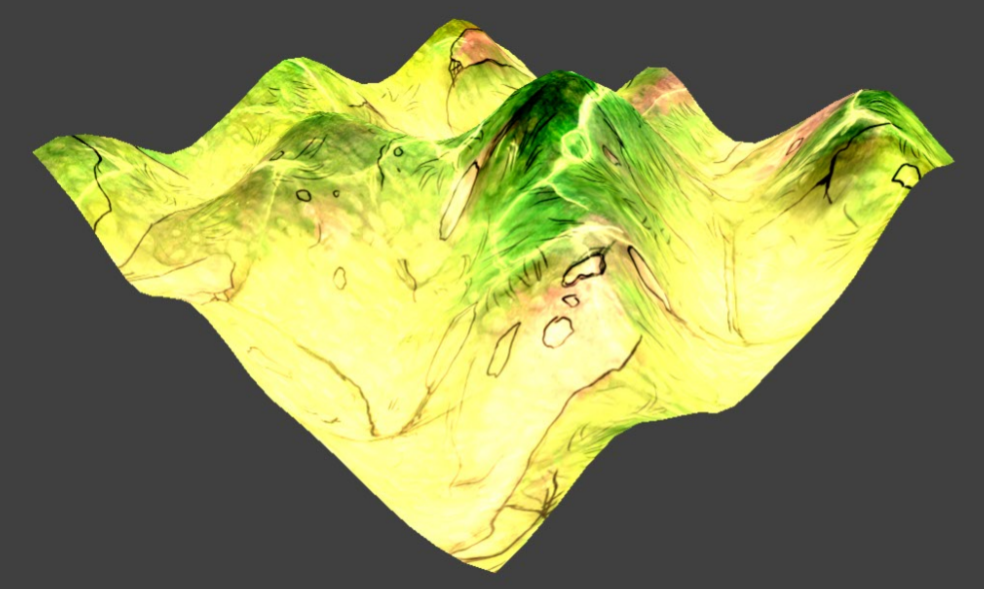
The purpose of this tutorial is to introduce the steps needed to generate the perlin noise map and use a vertex shader to sample said map.
This project has the ability to generate perlin noise map and use a vertex shader that samples said noise. The ProceduralGeneration class has a generatePerlin function that takes in a const int variable. This function returns the perlin noise map data. The function uses dimension and octave data to perform calculations. Using the x and y dimension data, the perlin data is calculated by taking the scale value and multiply it by x and y.
Using the octave data, the perlin data is calculated by taking the perlin sample value and multiplying it by the amplitude. In the vertex shader, the location of the position and texcoord are labeled. A uniform view_proj and perlin_texture are defined and the frag_texcoord is broadcasted out. In the main function, the frag_texcoord variable is set equal to the texcoord variable and the gl_Position variable is set equal to the view_proj variable times the position.